Compiled from clinical guidelines and peer-reviewed evidence.
Medically reviewed by Dr Cristian Dunker.
What you're cleaning | A fixed bridge of teeth and the gum it sits on, plus the small gap underneath. |
Daily tools | Toothbrush, water flosser, and floss passed under the bridge with a threader. |
The bit most people miss | The underside of the bridge, where it meets your gum. |
How long it takes | About 3 to 5 minutes, once you have the routine. |
Red flag to watch for | Bleeding, swelling, pus, or bad taste that doesn't settle. |
An All-on-4 bridge gives you a full arch of teeth that look and feel close to your own, so it is natural to assume you clean it the same way you always have. You mostly do, with one important addition. The part that decides how long your implants stay healthy is the gum the bridge rests on, and the narrow gap that runs underneath it. So when people ask how to clean All-on-4 dental implants, the answer comes down to two daily habits: brush the bridge twice a day like natural teeth, and clean underneath it every day with a water flosser or floss passed below the bridge. The brushing keeps it looking good. The cleaning underneath is what protects the implants.
Why cleaning under the bridge matters more than you think
Your All-on-4 or All-on-X bridge is fixed in place on a small number of implants. It looks and works like teeth, so it's tempting to clean it like teeth and leave it there. The problem is the gum underneath. That tissue is still living, and it still reacts to plaque biofilm (the sticky film of bacteria that builds up on teeth and gums). The bridge shelters the gum margin from your brush and from saliva, so plaque sits there undisturbed unless you actively clean it off.
Regular maintenance is associated with a lower risk of disease around implants, which is the whole reason this routine is worth your time (Monje et al., 2016).
What peri-implant mucositis and peri-implantitis actually are
Peri-implant mucositis is inflammation of the gum around an implant, with no bone loss yet. It's reversible if you catch it. Peri-implantitis is the next stage: inflammation that also destroys the supporting bone holding the implant. That part is much harder to reverse. The official definitions come from the 2017 World Workshop consensus. Peri-implant problems are the implant version of ordinary gum disease, and our library guide to chronic gum disease explains how that kind of inflammation starts and progresses.
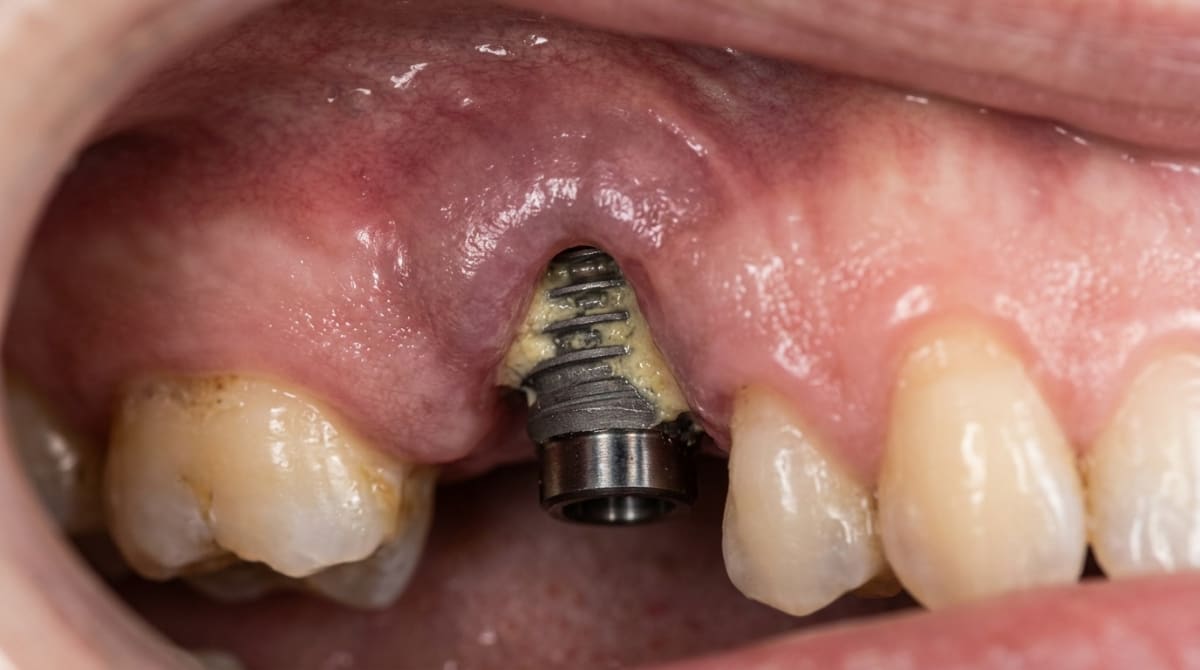
Representation of an implant with periimplantitis, caused by plaque accumulation.
Why a fixed bridge is harder to clean than natural teeth
With natural teeth, floss slips straight down between each tooth to the gum. A fixed bridge sits as one connected piece, often with a small gap between its underside and your gum. You can't floss "down" into that gap the usual way. You have to reach under and across it. That's why a standard brush-and-floss habit isn't enough on its own here.
How to actually clean an All-on-4 bridge (step by step)
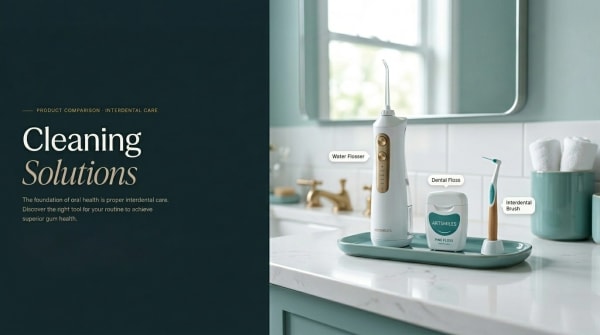
Building a simple daily cleaning routine is the key to looking after All-on-4 dental implants for the long term. You do not need a cupboard full of gadgets, but a few well-chosen hygiene products make the job far easier: a soft brush, a water flosser, and the special floss designed to pass under the bridge. The steps below turn that into a routine you can do in a couple of minutes, morning and night.
This is the routine that keeps the gum healthy. Take it slowly the first week, and it becomes second nature.
Step 1: Brush the outside and chewing surfaces
Use a soft toothbrush twice a day. Clean the front (cheek-facing) surfaces, the back (tongue-facing) surfaces, and the chewing surfaces, the same as you would with teeth. Angle the bristles gently towards the line where the bridge meets your gum and use small, light strokes. You're cleaning, not scrubbing. A low-abrasive toothpaste is less likely to scratch the bridge surface than a more abrasive whitening paste.
Step 2: Clean UNDER the bridge (the bit everyone misses)
This is the step that protects your implants. The space beneath the bridge needs cleaning once a day, ideally at night. You'll use a water flosser, threaded floss, or both. The goal is simple: physically wipe plaque off the underside of the bridge and off the gum it rests on. If you only change one habit after reading this, make it this one.
Step 3: Water flosser angle and technique
A water flosser sends a stream of water under the bridge to flush out food and loosen plaque. Start on the lowest pressure setting and build up to low-to-medium as you get comfortable. Hold the tip at roughly 45 degrees to the gum line, right where the bridge meets your gum. Trace the full arch slowly, front and back, pausing at the line under each tooth. Lean over the sink, because it splashes at first. For the general mechanics of using one well, see our guide to water flossers.
Do not use water flosser on zygomatic implants, as it would push rest of food under the gum line and cause infection. Do not use water flosser in the first two weeks after your all on 4 surgery, as it could open the suture and cause pain and infection.
Step 4: Thread floss or superfloss under the bridge
A water flosser flushes the area, but floss is what actually wipes the surfaces clean. Because the bridge is one connected piece, you need a floss threader (a small loop that carries floss into the gap) or superfloss, which has a stiff end built for threading. Pass the floss into the space under the bridge, then draw it along the underside in a gentle shoeshine motion. Work it around each abutment (the post that connects the bridge to the implant below). Move along to the next section and repeat across the whole arch.
Daily home plaque control is the foundation of implant maintenance, even though research has not yet settled which single method works best (Grusovin et al., 2010).
Your daily / weekly / 6-monthly routine
When | What to do |
Twice daily | Brush outer, inner, and chewing surfaces with a soft brush and low-abrasive paste. |
Once daily (night) | Clean under the bridge with a water flosser and/or threaded floss. |
Weekly check | Look in a mirror for redness, swelling, or food packing in one spot. |
Every 6 months | Professional clean and check, or as your dentist advises. |
The hygiene kit
You can build this kit from any Australian pharmacy or supermarket. None of it needs a brand name.
A soft or extra-soft toothbrush (manual or powered).
A water flosser with a tip suited to bridges or implants.
Floss threaders or superfloss for getting under the bridge.
Interdental brushes or a single-tufted brush (a small brush with one tight tuft) for tricky corners.
A low-abrasive toothpaste.
If your bridge was placed recently, the advice you were given after your final bridge was fitted takes priority while everything settles.
Common mistakes and myths
A few misunderstandings cause most of the trouble we see with these bridges.
"My bridge is fixed, so the gum underneath is sealed off" (myth)
This one's understandable, but it isn't true. The bridge isn't watertight against your gum. There's a small gap by design, partly so you can clean it. Bacteria, saliva, and food all reach that space. If it were sealed, you wouldn't need to clean under it at all. The fact that you do is exactly why this gap exists.
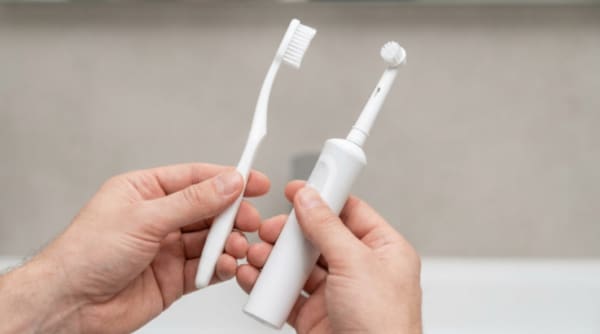
Should you use an electric toothbrush? (resolving the contradiction)
You'll hear mixed advice here. Powered brushes are generally effective and safe on an implant bridge. The real variable isn't manual versus electric, it's technique. The mistake to avoid is over-scrubbing the gum margin with heavy pressure, whichever brush you hold. Use a light touch and let the brush do the work. Both options keep the bridge clean when used gently, as general-practice maintenance reviews note (British Dental Journal, 2024).
Who needs to clean differently
Some people carry a higher risk of disease around implants and benefit from extra care. If you have a history of gum disease, your risk of peri-implant problems is higher, and more frequent professional maintenance is worth discussing (Monje et al., 2016). Smoking and diabetes are also widely recognised as raising that risk. Australian practice patterns for implant maintenance vary, so ask your own dentist what schedule suits you (Cheung et al., 2021). If arthritis or limited dexterity makes fine movements hard, a water flosser and a powered brush do much of the work for you and are easier to grip.
When to see a dentist
Bleeding when you gently clean and it doesn't settle within a few days is worth a check. Bleeding on gentle probing is the hallmark sign of peri-implant mucositis (2017 World Workshop consensus). Other red flags include swelling, pus, a persistent bad taste or odour, the bridge feeling loose, or gum receding enough to expose metal. None of these mean you've done something wrong, and none of them are for self-diagnosis. They mean it's time for an assessment. You can book one at ArtSmiles, and our All-on-X implant service page explains what an assessment involves. If symptoms come on quickly or feel severe, our emergency dental care page explains how to be seen sooner.
References
Berglundh, T., Armitage, G., Araujo, M. G., et al. (2018). Peri-implant diseases and conditions: Consensus report of workgroup 4 of the 2017 World Workshop on the Classification of Periodontal and Peri-Implant Diseases and Conditions. Journal of Clinical Periodontology, 45(Suppl 20), S286-S291. https://pubmed.ncbi.nlm.nih.gov/29926491/
Monje, A., Aranda, L., Diaz, K. T., et al. (2016). Impact of maintenance therapy for the prevention of peri-implant diseases: A systematic review and meta-analysis. Journal of Dental Research, 95(4), 372-379. https://pubmed.ncbi.nlm.nih.gov/26701350/
Grusovin, M. G., Coulthard, P., Worthington, H. V., George, P., & Esposito, M. (2010). Interventions for replacing missing teeth: Maintaining and recovering soft tissue health around dental implants. Cochrane Database of Systematic Reviews, (8), CD003069. https://pubmed.ncbi.nlm.nih.gov/20467640/
Cheung, M. C., Hopcraft, M. S., & Darby, I. B. (2021). Dental implant hygiene and maintenance protocols: A survey of oral health practitioners in Australia. Journal of Dental Hygiene, 95(1), 25-35. https://pubmed.ncbi.nlm.nih.gov/33627450/
Maintenance of peri-implant health in general dental practice (2024). British Dental Journal. https://www.ncbi.nlm.nih.gov/pmc/articles/PMC11126374/
A note on this article
This article is for educational purposes only and does not constitute a clinical diagnosis. Please consult a registered dental practitioner for assessment and treatment advice.
The image accompanying this article is AI-generated and provided for illustration only. It is not a clinical photograph of a patient or of a specific dental result.
Frequently asked questions
Can you floss All-on-4 implants?
Yes, and you should. You can't floss the usual way, because the bridge is one connected piece rather than separate teeth. Instead, you use a floss threader, a small loop that carries floss into the gap under the bridge, or superfloss, which has a stiff end made for threading. Once the floss is under the bridge, you wipe it along the underside and around each abutment. Doing this once a day, usually at night, is one of the most useful habits for keeping the gum underneath healthy.
Do All-on-4 implants need to be removed for cleaning?
No. An All-on-4 or All-on-X bridge is fixed, so you clean it in your mouth, just as you would your own teeth. You don't take it out at night or for cleaning. Your dentist can unscrew and remove it during a professional visit if they need to clean underneath thoroughly or check the implants, but that's their job, not yours. Day to day, everything you need to do happens with a brush, a water flosser, and floss threaded under the bridge.
How often should I clean my All-on-4 bridge?
Brush twice a day, and clean under the bridge once a day, ideally at night when food and plaque would otherwise sit there for hours. On top of your home routine, plan a professional clean and check every 3 to 6 months, or however often your dentist recommends for you. People with a history of gum disease, and those who smoke or have diabetes, may be advised to come in more often, since maintenance matters most when the risk of disease around implants is higher (Monje et al., 2016).
Can food get stuck under the bridge?
Yes, this is common and not a sign anything is wrong. There's a small space between the underside of the bridge and your gum, and food can pack into it, especially after meals. A water flosser is the quickest way to flush it out, and threaded floss clears anything left behind. If food keeps packing into the same spot every day, mention it at your next visit. Sometimes a small adjustment helps, and persistent trapping in one area is worth your dentist taking a look at.
Can All-on-4 implants get infected (peri-implantitis)?
They can. Peri-implant mucositis is inflammation of the gum around the implants, and it's reversible if caught early. Peri-implantitis is the more serious stage, where the bone supporting the implants is also lost. Both are driven by plaque left around the bridge, which is why daily under-the-bridge cleaning matters so much. Watch for bleeding that doesn't settle, swelling, pus, or a bad taste. Bleeding on gentle probing is the early hallmark (2017 World Workshop consensus). If you notice these, see your dentist promptly.
Written by Dr. Cristian Dunker, BDSc, MBA.
Medically reviewed by Dr. Cristian Dunker.